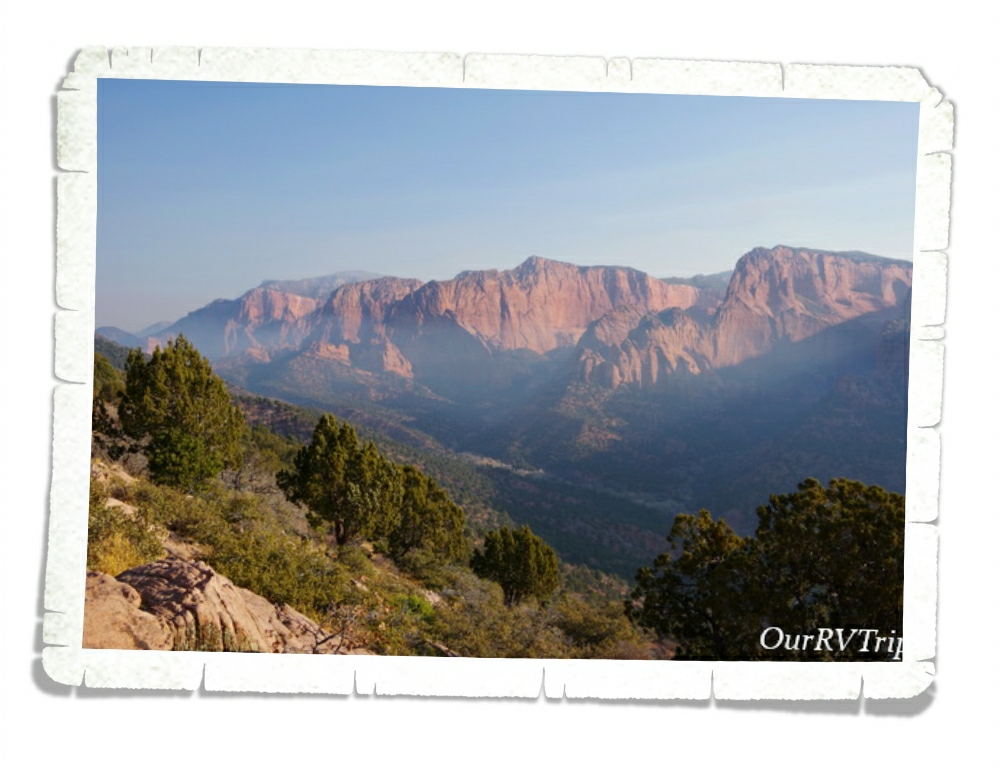
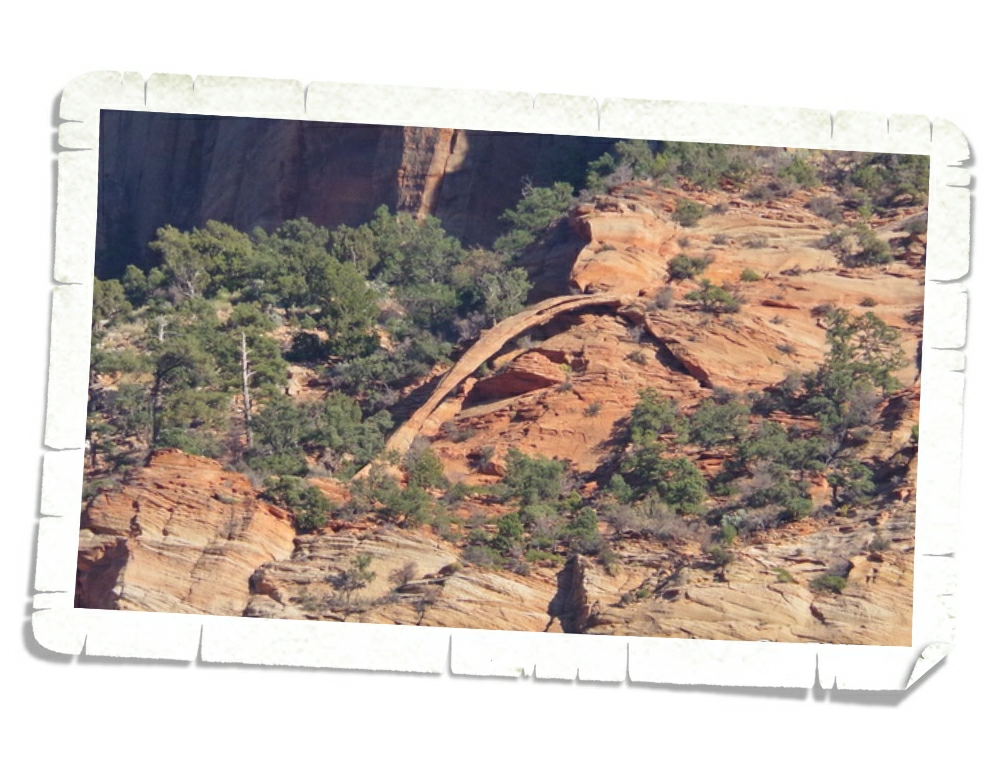
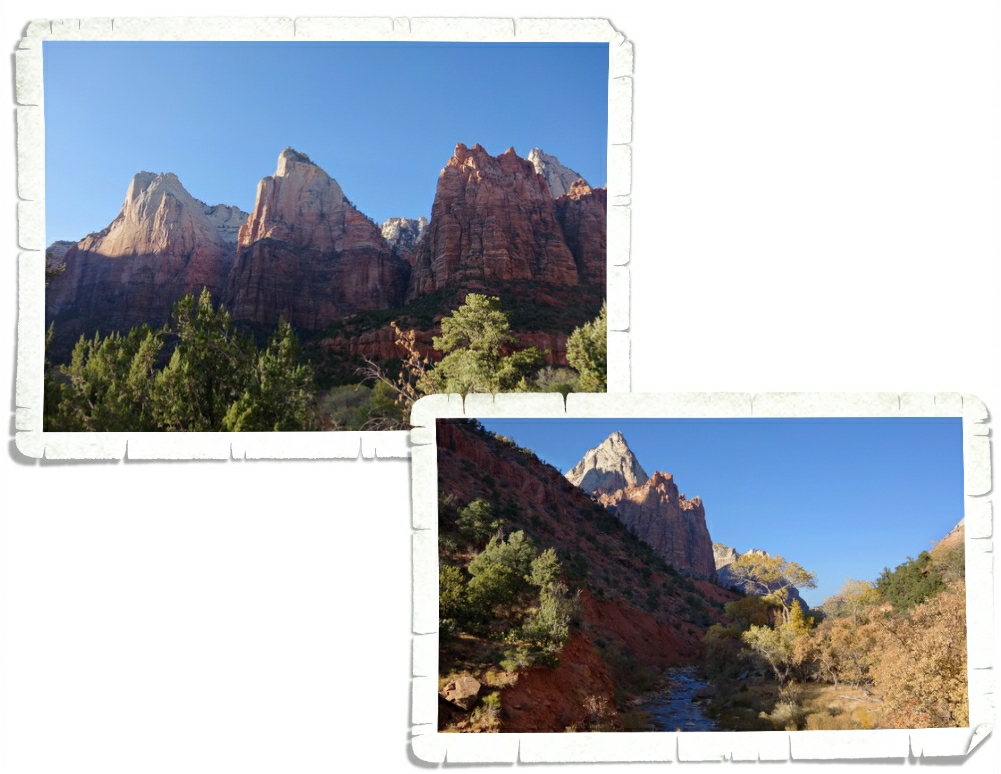
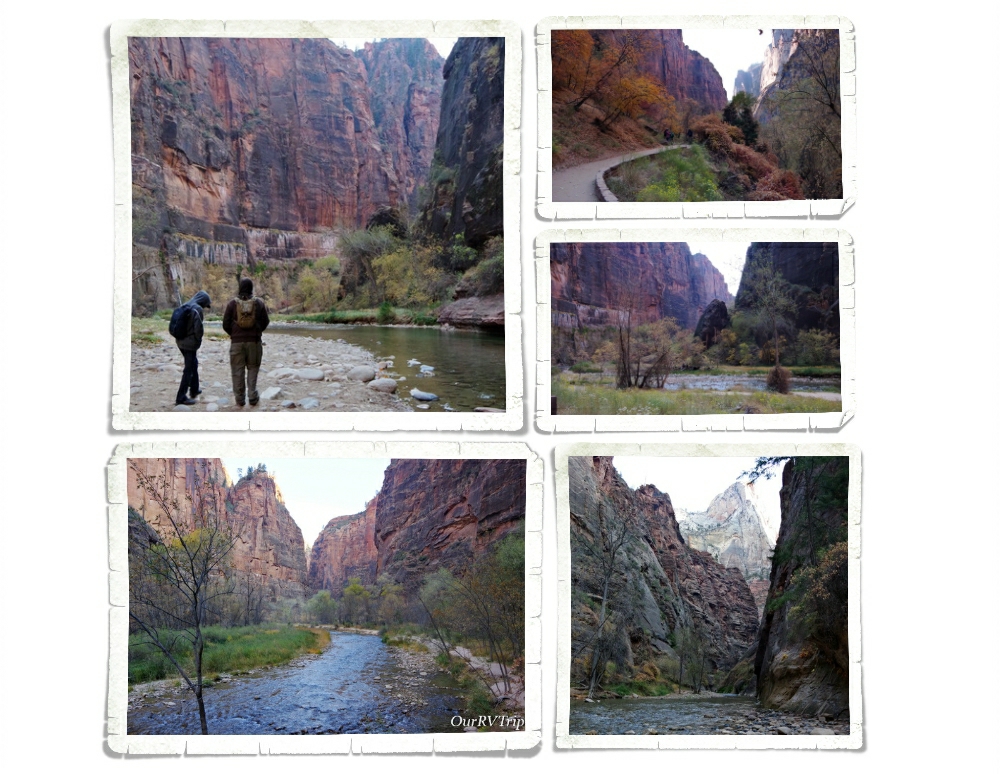
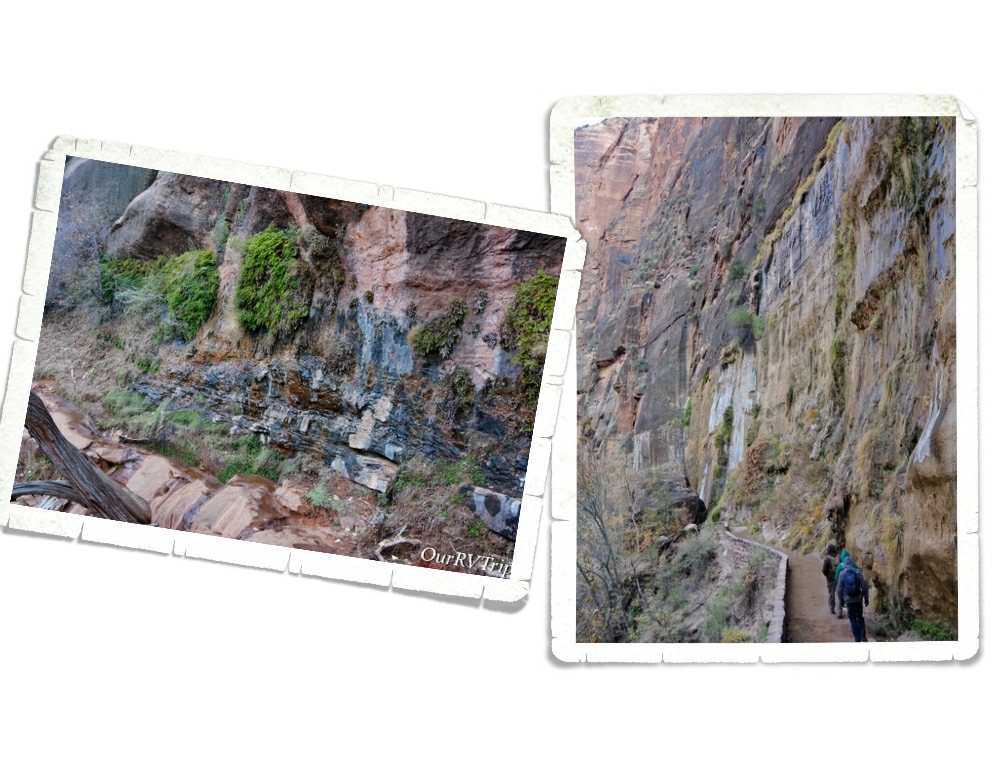
Tag: Hiking

Ancient Mountains

Ancient Mountains

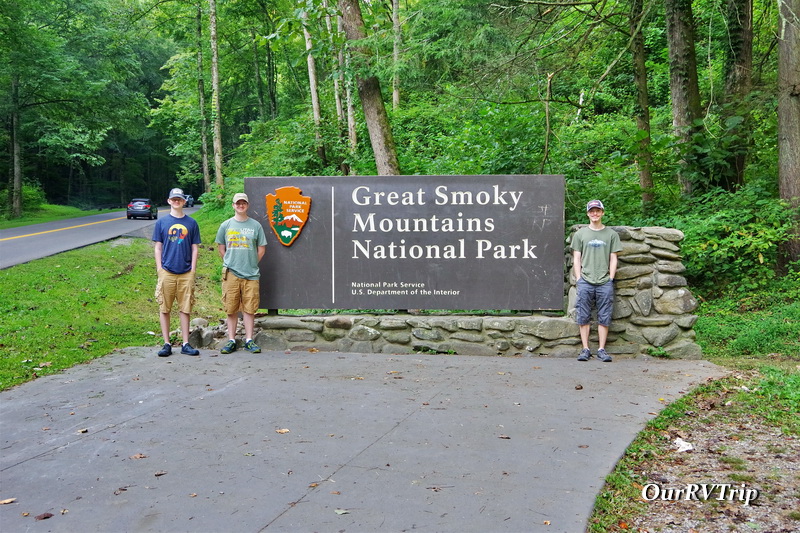
Hey Guys! We spent two weeks in Pigeon Forge so we could explore Great Smoky Mountain National Park. It was a very busy two weeks…we did as much as we could…and we didn’t even begin to scratch the surface of what’s available to do in the area.

I’ve put off visiting this area of the country for awhile now…for various reasons. The main reason is how incredibly busy it is. Great Smoky Mountain NP is America’s most visited National Park. It’s crowded. The towns of Pigeon Forge and Gatlinburg are the two main towns people stay in when visiting and Guys, it was insanely busy. Crowds aren’t our thing. And…if I’m being completely honest…I was comparing the Smoky Mountains to the Rocky Mountains…the Smokies didn’t seem that impressive to me.

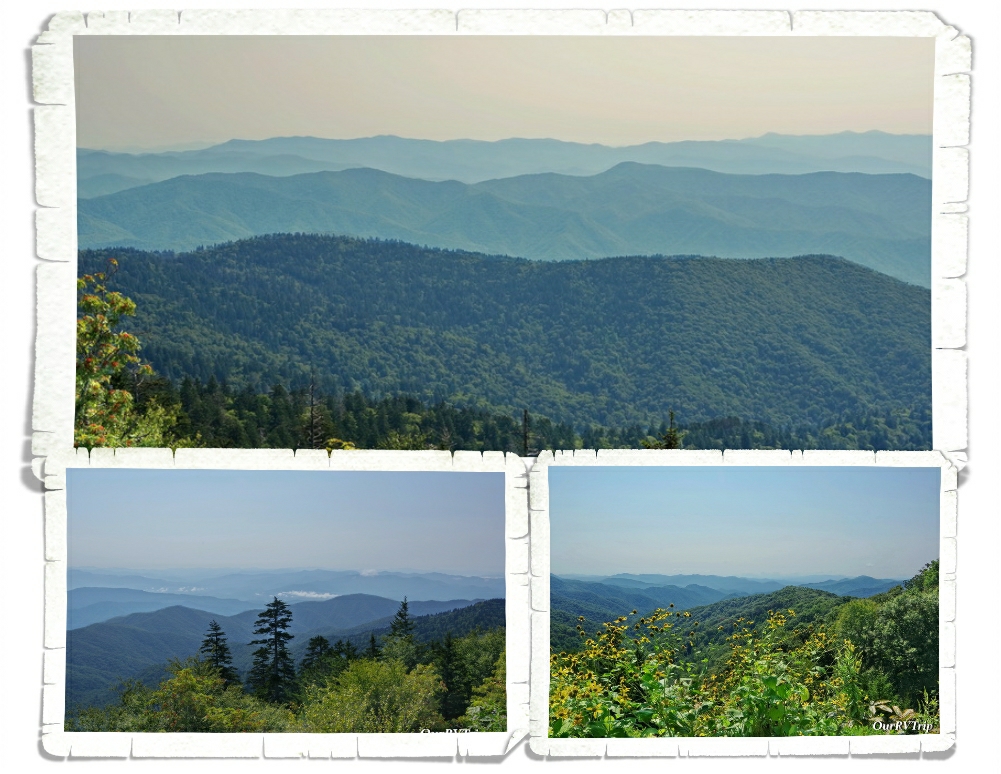
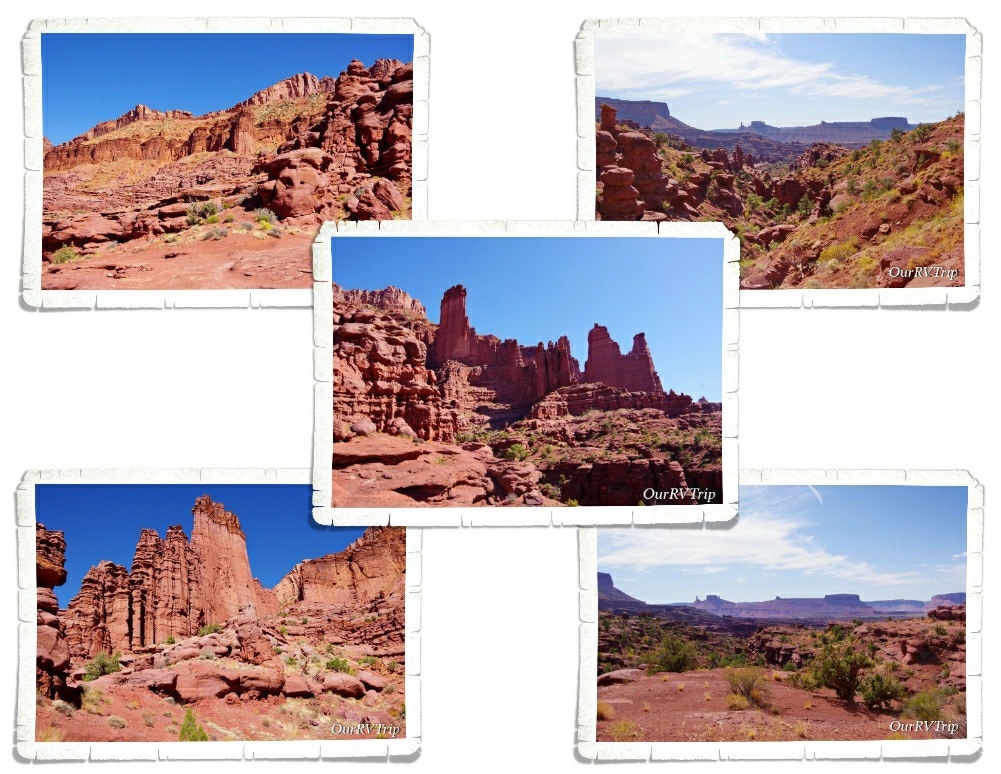
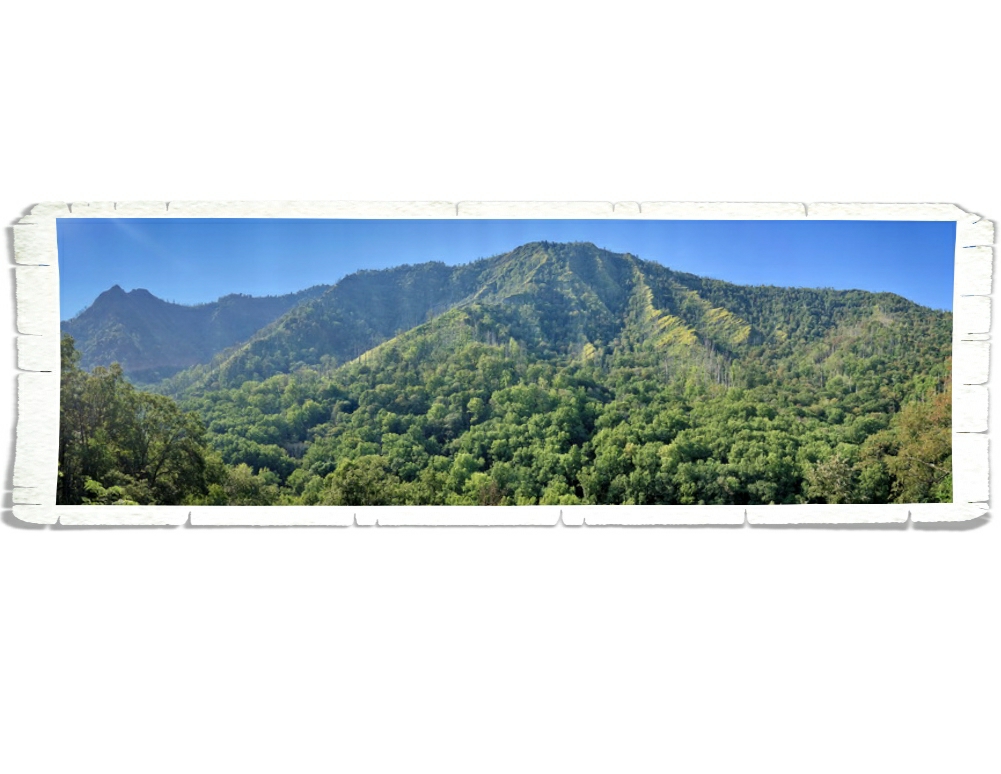
The Appalachian mountains that you find within Great Smoky Mountain NP were formed 480 million years ago while the Rockies are much younger and were formed somewhere around 285 million years ago. When the Appalachians were younger and still growing, it’s thought that they were actually bigger than the Rockies are today. We’ve come to affectionately refer to the Smoky Mountains as old man mountains. Today, the highest peak in Smokies is close to 6,600 feet and while it’s not as high as what you can find in the Rockies…the views are still impressive. The park get’s it’s name from the constant presence of fog that seems to cling to the mountains. While the fog is thinker in the mornings, it’s pretty much there all day and can make for some very interesting views.

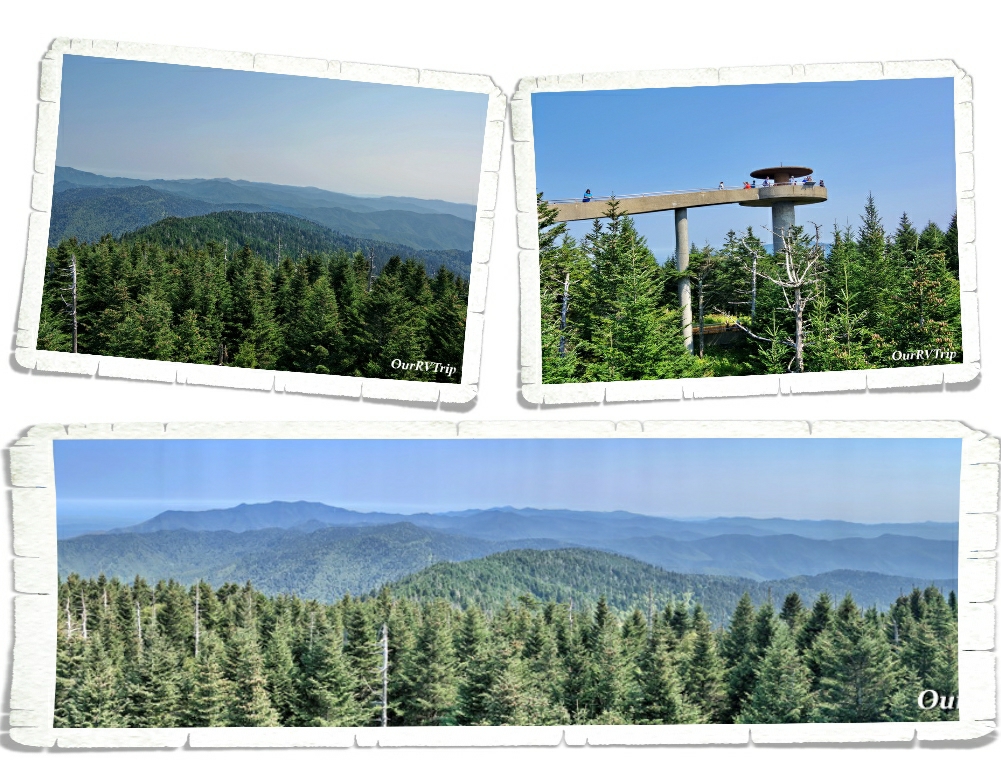
One of the most visited places in Great Smoky Mountain NP is Clingmans Dome. I always thought Clingmans Dome was the name of the tower you can hike up for a view, but actually, a dome is what they call a rounded mountain or ridge top. Clingmans Dome stands at 6,643 feet and is the highest point in the park. The trial to get to the observation tower is only half a mile long, but it feels like you’re hiking straight up. It’s a steep trail and has zero shade so if you ever go, be prepared for that. Once you reach the top of the observation tower, you’re rewarded with a 360* view of the Smoky Mountains and if you’re there on a clear day, you can see five different states. We went on a clear day and once I caught my breath from all of the up…the view was fantastic! In the 1800s people called the peak of Clingmans Dome, Smoky Dome due to the seemingly ever present smoky effect of the fog and clouds.

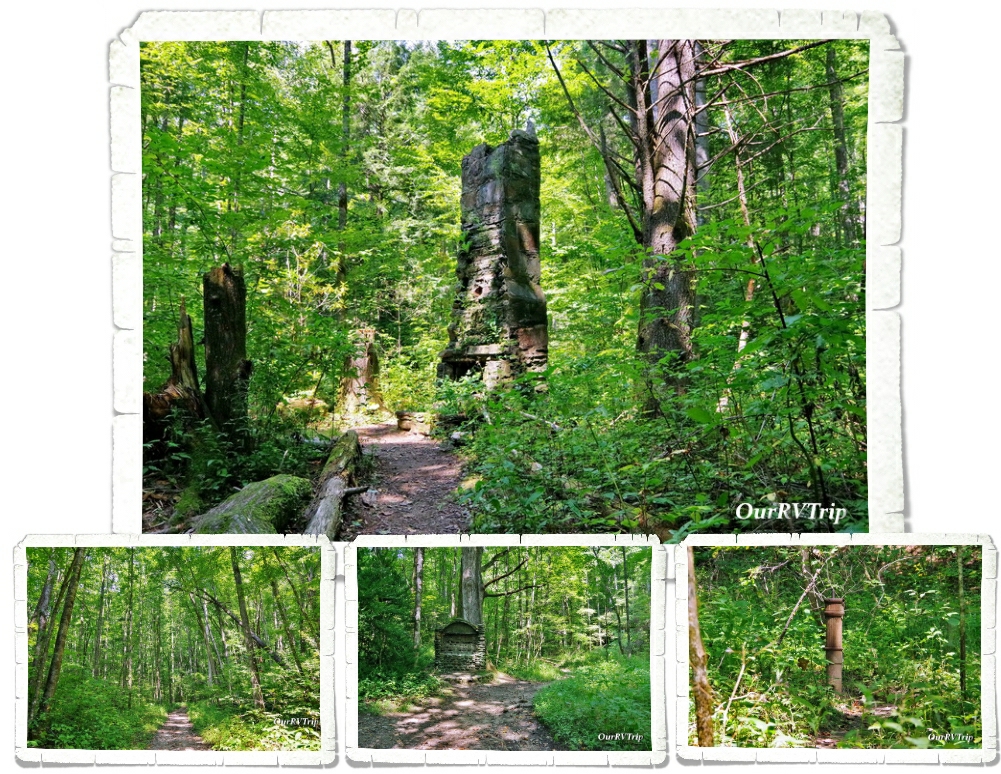
You never know what you’re going to find when you head out on a trail in Great Smoky Mountain NP. We found an old CCC camp one day This particular camp was also used to house and continue some of the CCC projects by Conscientious Objectors of WWII in 1942. Franklin D. Roosevelt established the Civilian Conservation Corps (CCC) in 1933 to combat two problems in the United States… reforestation of our Nation’s timber resources due to the commercial logging and the unemployment problem during the Great Depression. The average CCC employee was unemployed and unmarried men between 18 and 22 years old. All over the Country, CCC camps were established to house, educate and feed the volunteers (where were paid $30 a month) while they built roads, trails, and buildings that we still use to this day. The National Park System benefited greatly from the CCC and the Great Smoky Mountain NP benefited more than any other park. There were 22 CCC camps that housed up to 3,000 men. The camps were abandoned a long time ago, but you can still find traces of some of them. We’re big fans of the CCC program and what it offered our people in their time of need and all of the amazing things they did for our Nation.

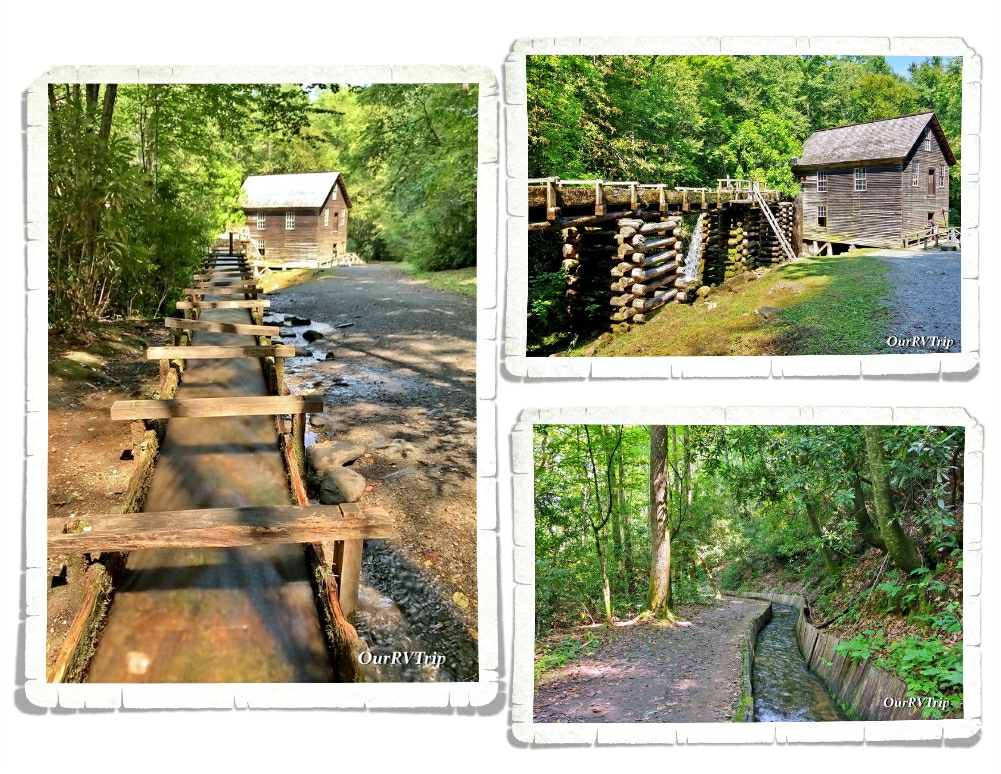
Mingus Mill was built in 1886 and was used to grind corn and wheat for some of the nearby communities. It was in pretty bad disrepair and restored by the CCC in 1937. Today, you can go and see how corn and wheat used to be milled. You can even buy some fresh corn meal or wheat flour from the miller that’s posted there. We enjoyed walking around the mill and chatting with the miller there. We’ve been to other mills before, but it’s always interesting to see the differences in each mill.

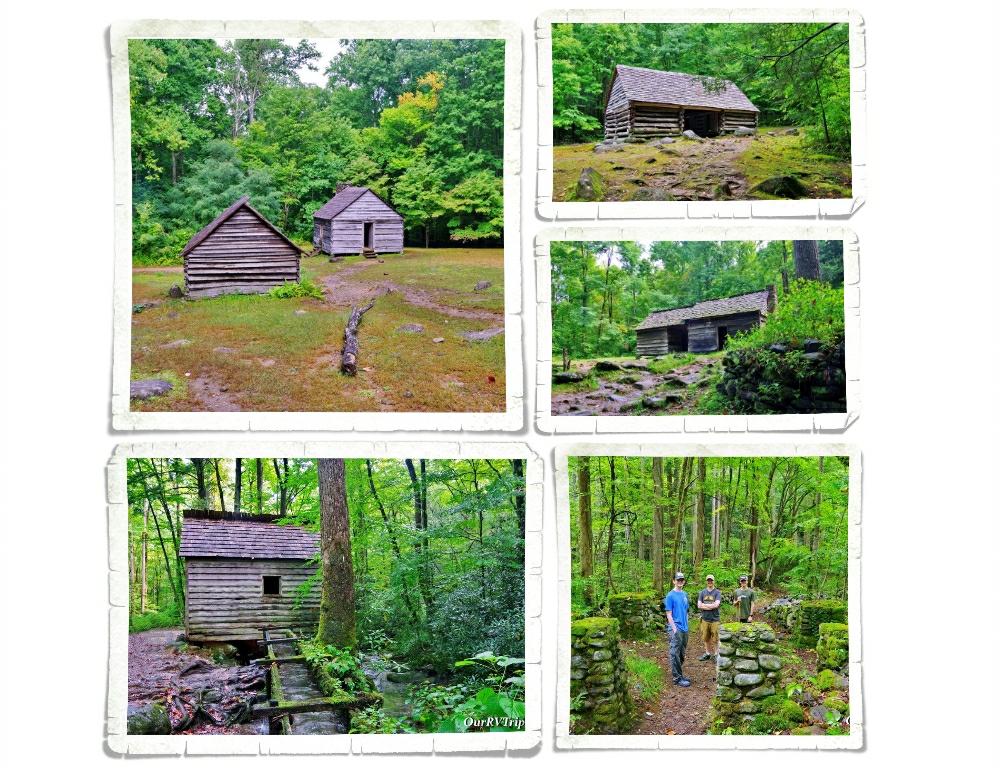
Before it was a National Park, it was home to thousands of people. You can see the homes and livelihoods that were left behind when the area was made into a National Park. Land was purchased as it became available and the few that didn’t want to sell their homes or leave their businesses and move were incorporated into the park but with the right to remain on their land until they died. There are cabins all throughout the park that are left over from another life. All of the ones we found were open to exploration.

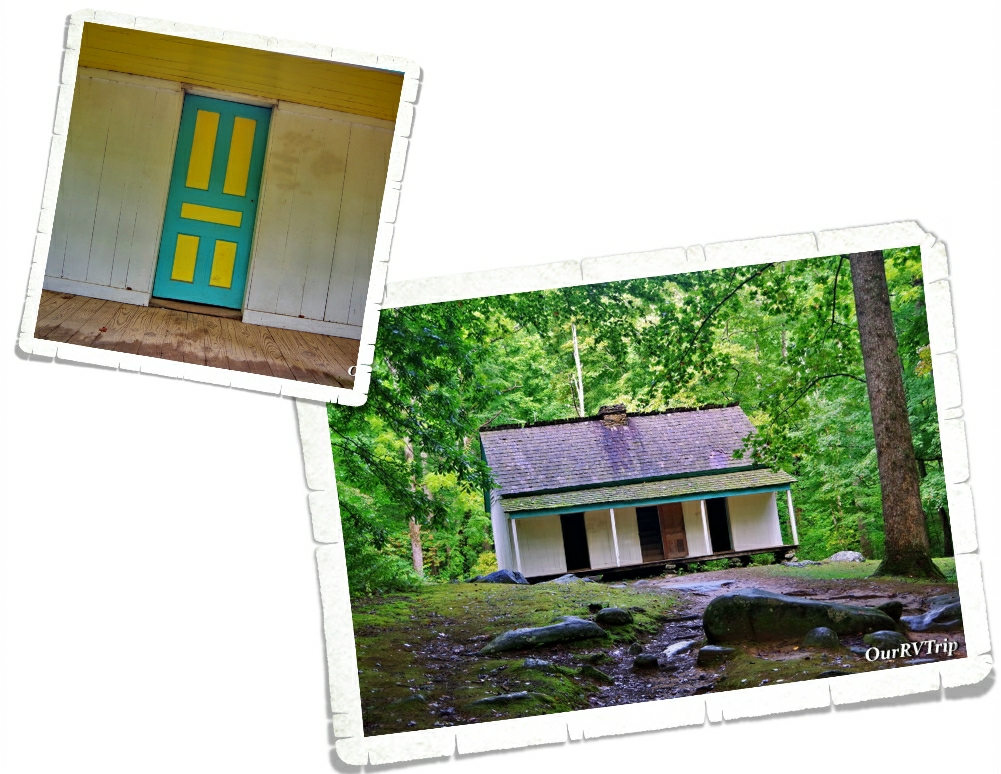
Alfred Reagan was a farmer of cattle, crops, fruit and even timber. He and his wife made their life and raised their family in one of the small communities on the rocky mountainside of the Appalachian mountains. Life was hard but good. They used all three colors available from Sears Roebuck offered to paint their home. We found that it was interesting that this was the only cabin we found that was painted.

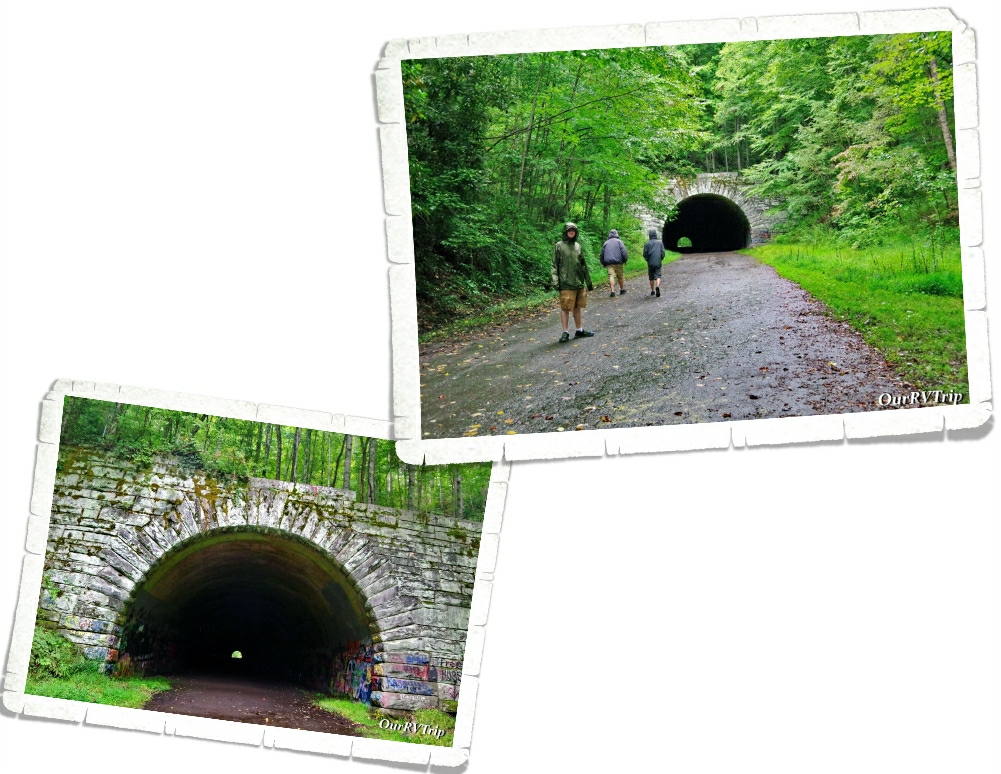
Back in the 1930s and 1940s, Swain County gave up pretty much all of it’s privately owned land to make a portion of the Great Smoky Mountain National Park and to create Fontana Lake. The lake was used to create the electricity to run the aluminum plants for the Oak Ridge Tennessee’s National Laboratory during WWII during the Manhattan Project. Hundreds of families were forced to leave the small mountain communities that had been their home for generations. With the creation of Fontana Lake homes and the old highway 288 that lead to them were all under the waters of the lake. The citizens of these small communities were all promised by the government that a new road would be made so they would continue to have access to the small cemeteries where generations of their family members were buried. For environmental and construction issues that came up during the construction…the new road was put to a stop and never finished. The “Road To Nowhere” was born. Today it’s a neat place to go for a walk. You can walk all the way through the tunnel and take one of the trails at the end. The day we went, it was raining so we didn’t do any hiking, but I’ve read that you can hike by some of the abandoned homesteads.

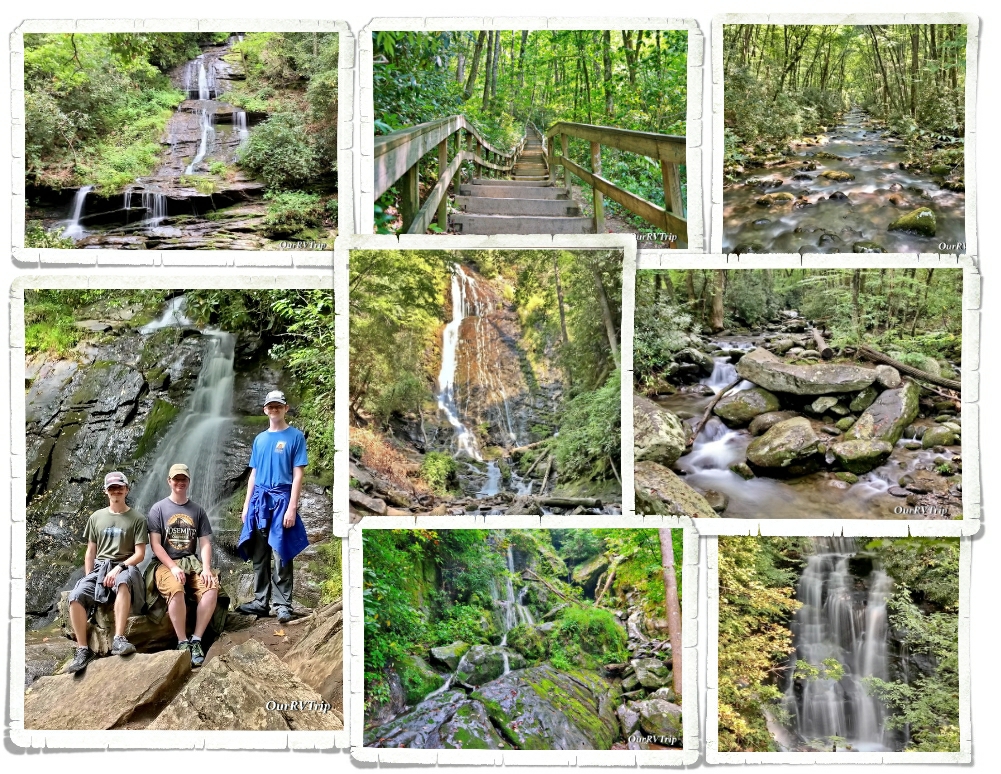
Water is a constant presence at Great Smoky Mountain National Park. If it’s not the rain (an average of 55 to 85 inches per year depending on where you are in the park) it’s the rivers/creeks/streams or waterfalls. It makes for a very interesting and diverse park. We had the best time chasing waterfalls of all sizes during our time exploring this NP unit! What we didn’t love…all of the up that most of those waterfalls took to see. Whoo!! So. Many. Stairs!! If waterfalls are your jam…Great Smoky Mountain NP has over 2.000 miles of waterways and over 100 waterfalls for you to explore to your heart’s content.

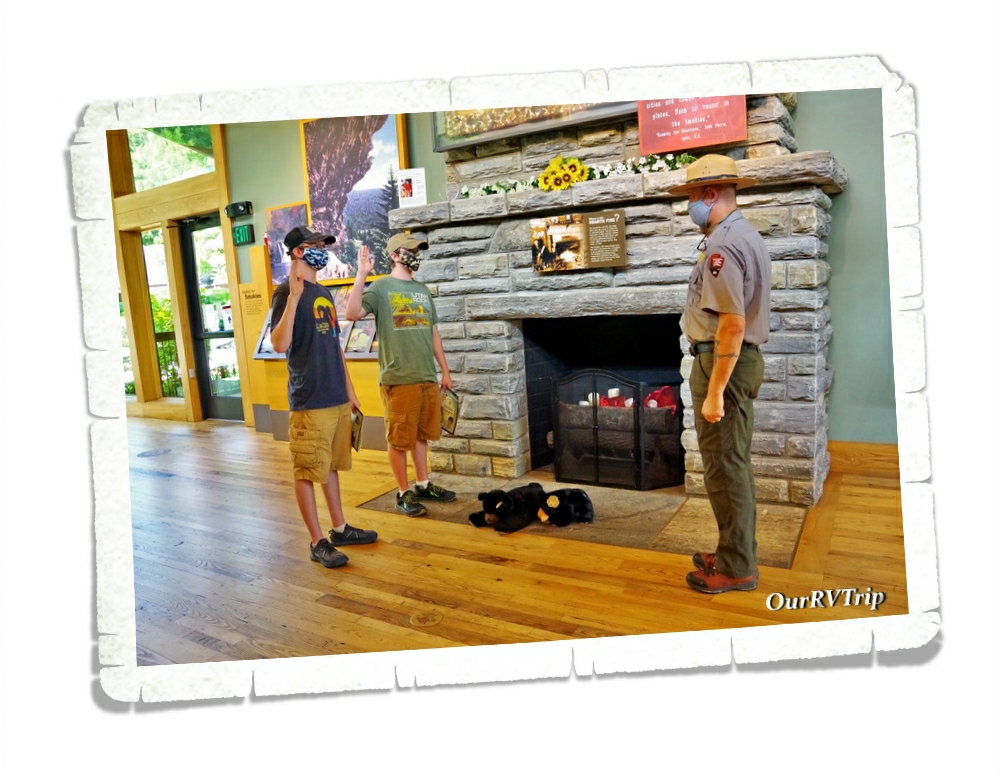
Great Smoky Mountains National Park was park unit 186 for us. The boys got their Junior Ranger badge and chatted with a Ranger about his time at the park. If you ever want to know an insider’s tips to a park…talk to a Ranger. In a park that is as busy as GSNP…tips about the not so popular, but just as good places can be invaluable.

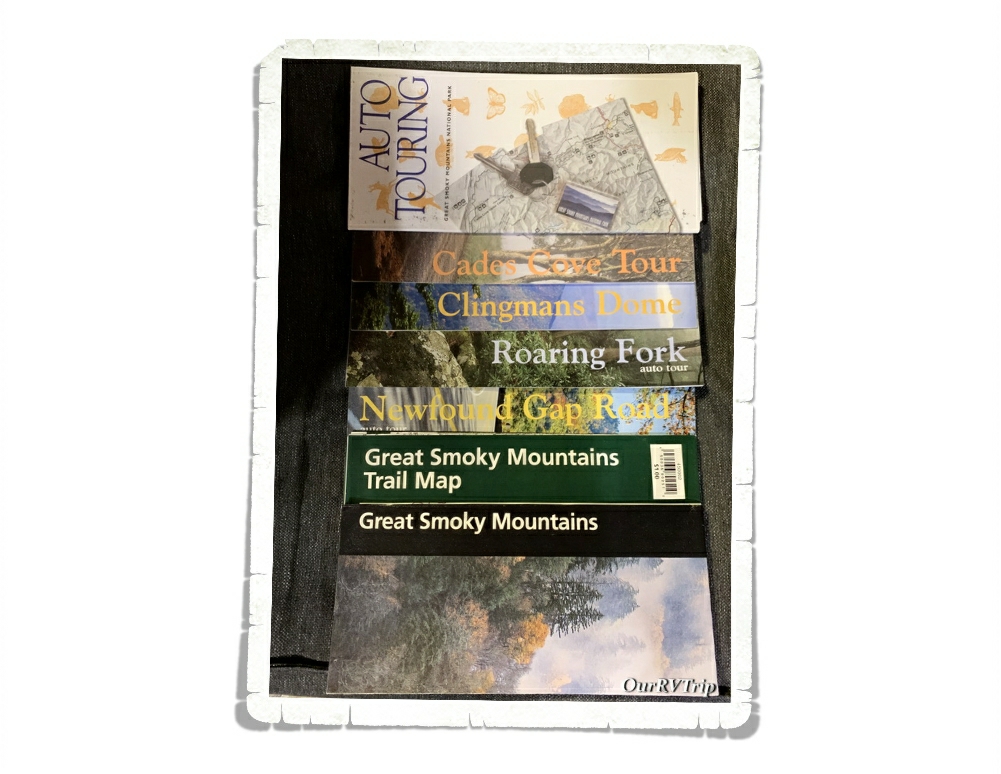
Seven years ago…when we were just starting to plan out this crazy nomad life of ours…I sent off for information about attractions from several states. Tennessee sent me a ton of park brochures from Great Smoky Mountains NP. I filed them away and kept them safe until we were able to finally use them this year! We used them all in our planning and explorations. You can buy them in the park and I would highly recommend it. The little tidbits they offer about the park are great.

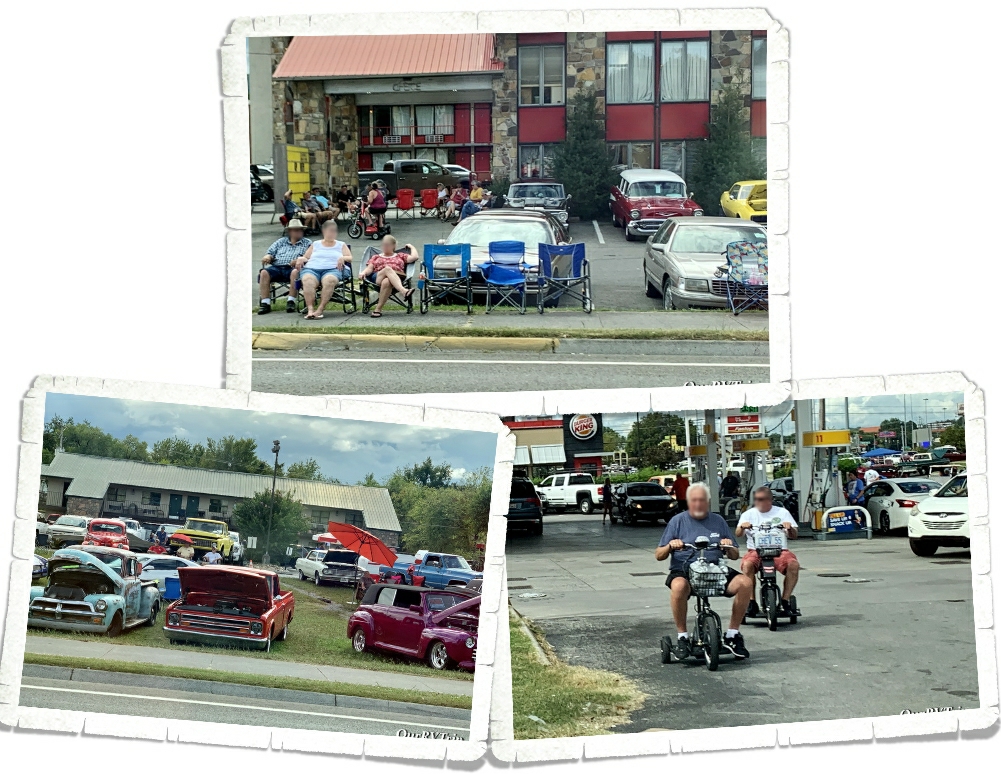
Apparently, there’s an event almost every weekend in Pigeon Forge. While we were there, the event was a car show and it was a full week thing. It was basically like a huge tailgating party that stretched over several blocks. Cars were out, people were out, there was food and fun and…scooters. Guys, the scooters were a spectacle all on their own. We saw so many scooters being ridden around by people. It was funny to watch the scooter trains as they wound their way through the cars and streets.

There’s a road called The Tail of the Dragon that is a huge draw for motorcycles and sports cars. It has 318 curves in 11 miles. I expected more views from this stretch of road…It was mainly just views of the road in front of us. We did see tons of motorcycles and expensive sportscars zooming around. There’s one pull off and the view wasn’t that great. I did some research and found that there are close to 100 crashes a year on this 11 mile stretch of twisty road.

Did you know there’s a Tennessee Whiskey Trail? We did the Kentucky Bourbon Trail…if you missed that post, check it out here…So, we thought we should do the TN Whiskey Trail too! In KY you got a t-shirt when you finished the trail. In TN you get a poker chip at each Distillery you visit and then when you’re done, you send off your passport and get the rest of the poker set! We did a few distilleries in the two weeks we were in Pigeon Forge. Ole Smoky was fun and we got a special t-shirt (that is super soft) for doing a tour. It’s still weird to have a kid who’s old enough to do the tastings with us now…

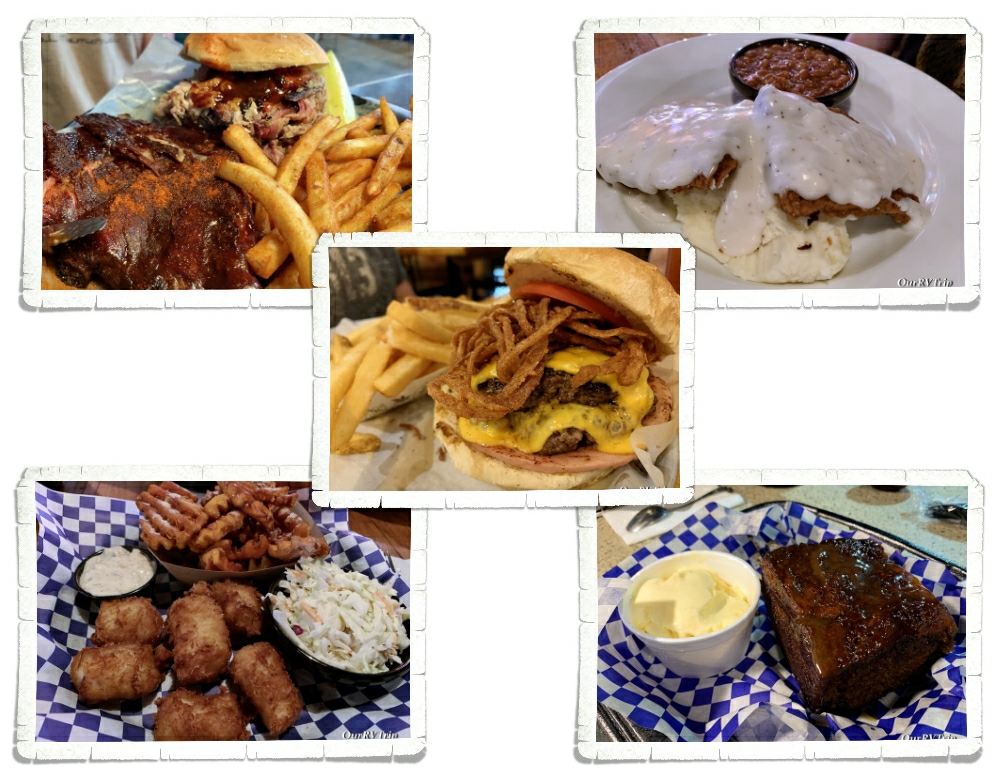
If you’re a foodie, you’ll have plenty to choose from between Pigeon Forge and Gatlinburg. There are tons of options. We enjoyed everything we got. It was super crowded so we didn’t go to too many places, but the spots we hit were all good. Corky’s BBQ and JT Hannah’s were our favorites.

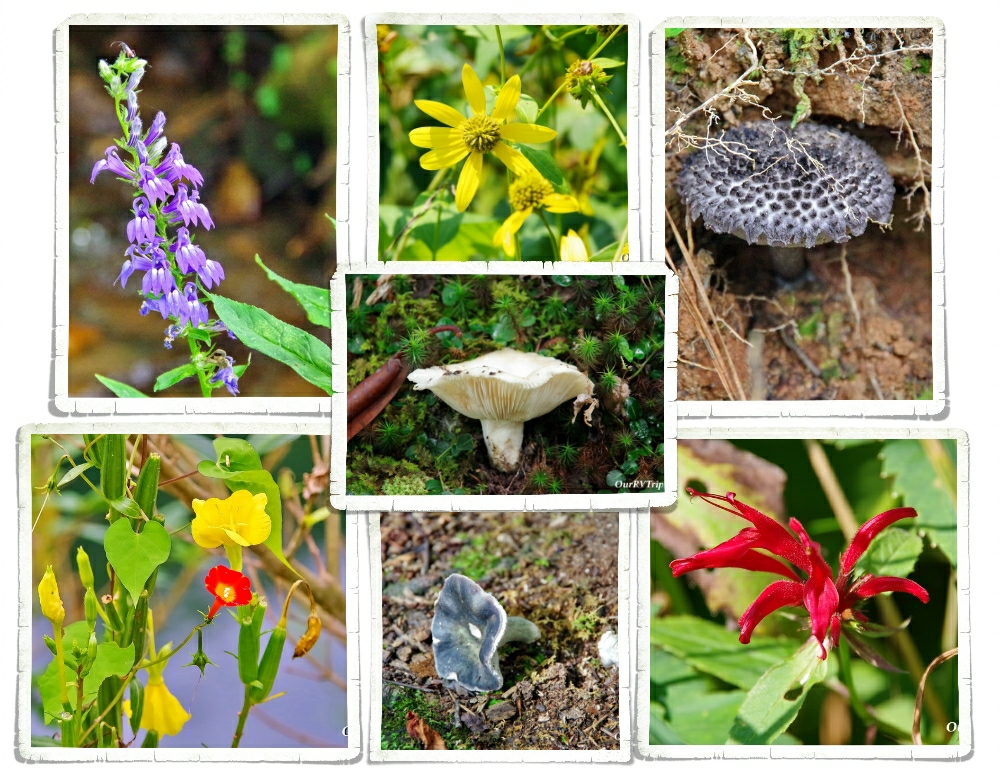
We were in Pigeon Forge the last couple of weeks of summer so the flowers were kind of slim pickings. I did find plenty of mushrooms/fungi though! So many different shapes and colors!

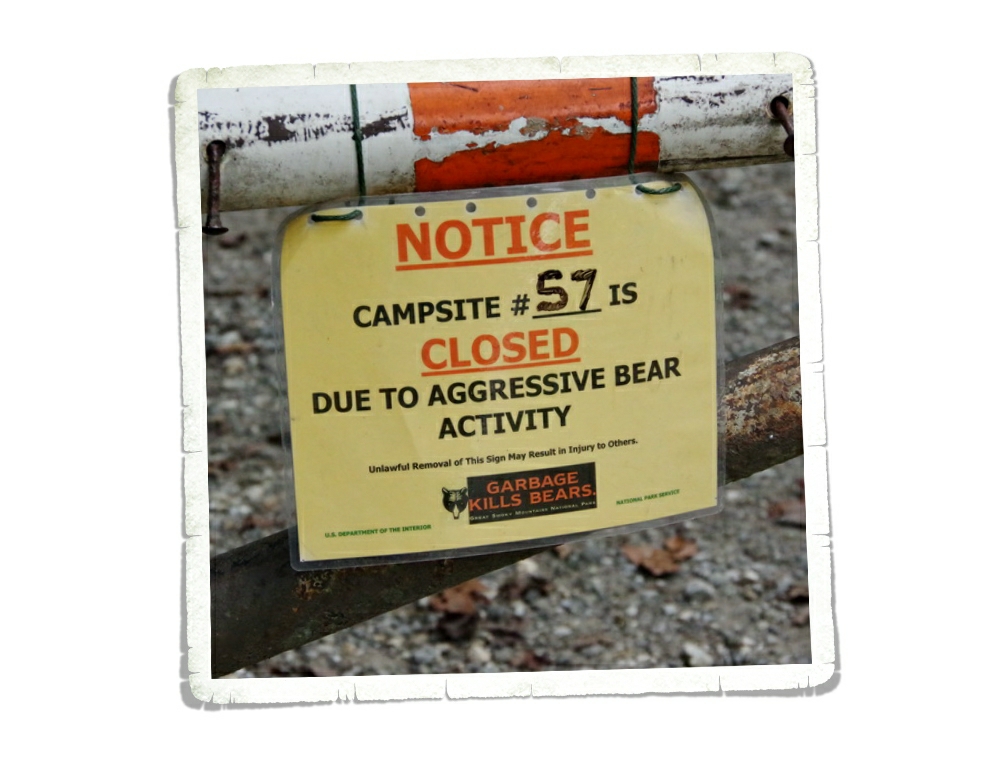
There are something like 1500 bears in the Smoky Mountains. We heard from so many people that they always see bears when they go. We saw signs about bear activity but didn’t see a single bear. Not even a foot print. Due to road work, we didn’t get to go to Cades Cove, which is supposedly where a ton of bears like to stay…maybe we’ll see some next time.

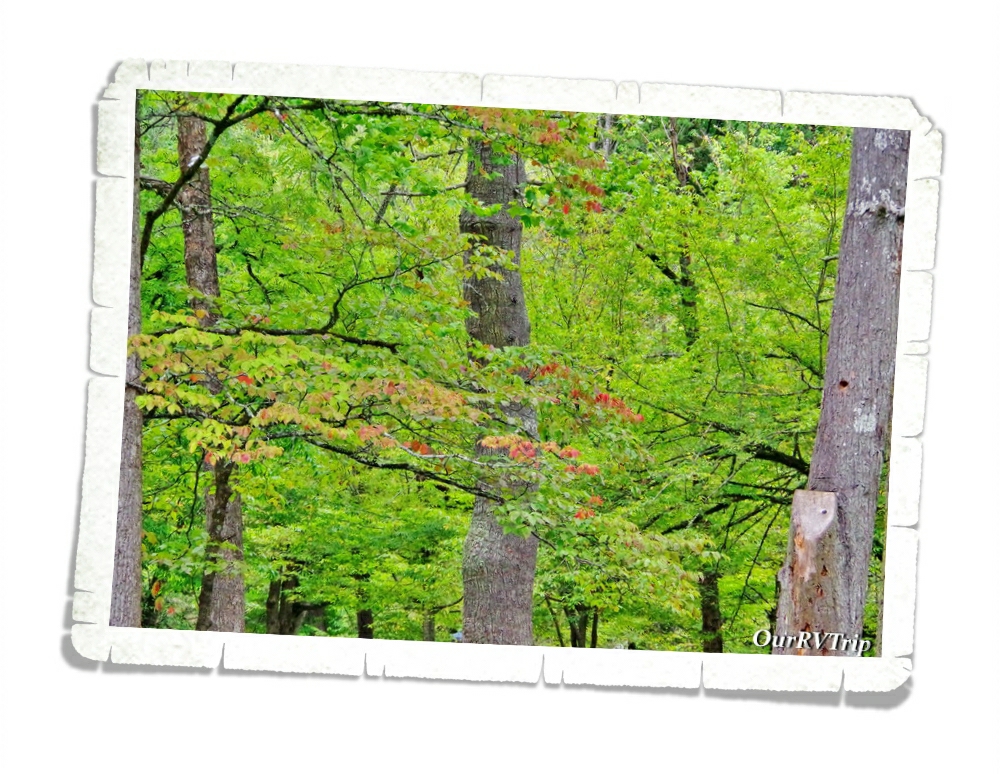
That’s it Guys! We liked Great Smoky Mountains National Park a lot more than we thought we would and we will definitely go back and do some more exploring…soon! When we left the leaves were just starting to hint at changing colors. I’d love to go back during prime fall colors!

See y’all down the road!

#NationalParkTour

Zion National Park

Zion National Park

Hey Guys!! We’ve made it to the last post of the Southern Utah section of our National Park Tour and our focus is on Zion National Park!

This canyon was called Mukuntuweap by the areas first inhabitants and changed to Zion when it became a National Park in 1919. It’s not the biggest National Park in the country, but it’s definitely one of the most popular. Zion National Park has six sections. Yup, you read that right. Six. We didn’t make it to all six sections, but we made it to four and saw the beginning of a different section (the narrows), but didn’t actually explore it.

Let’s start with the Zion-Mt Carmel Tunnel. Oh, the things I’ve heard about this tunnel. When I first decided to do a tour through Utah’s Big Five, I knew we would end with Zion which meant we would either have to go through this tunnel or find a way around it. The tunnel itself is just over a mile long and is 13’2″ tall in the center. So, if you’re in a vehicle over 11’4″…well, you’ll need to drive down the middle of this two way tunnel to make it through. Which, means you have to pay $15 and have an escort. I didn’t want to even think about that tunnel and our home-on-wheels so we went around. We did go back and drive through the tunnel in our 4Runner and decided we’d made the right decision.

The tunnel itself it pretty cool! Construction started on it in 1927 and completed in 1930 with a cost of $503,000…to put that into perspective…that would be around eight million dollars today (2019).

In the tunnel, there are big windows (galleries) that allow some natural light in. I got a picture out one of the windows…it was tricky since you can’t slow down or stop within the tunnel. Originally, the windows were used to get rid of the rock the tunnel was made of. The rock from the tunnel construction was dumped out of the windows into the canyon below.

The first section of Zion that we explored was the Upper East Canyon. We went through the tunnel so we could do the Canyon Overlook Trail. We picked the wrong time of the day to do this trail. Pretty much all of it was in the shadows which made getting a good picture of anything difficult. The hike was really cool though! We hiked up onto the side of a canyon, through a little cave, across a weeping wall, and out to the overlook. If you do this hike, make sure you’re wearing shoes with good grip. There’s a lot of walking on slick rock that is sometimes wet. We saw a few people doing this hike with the wrong shoes and they struggled quite a bit.

The second section we explored was Kolob Canyons. This section is about a thirty minute drive from the main canyon and has it’s own visitor center and ranger station. Because this section is so far away from the more popular Main Canyon, it sees fewer visitors. If you’re wanting to get away from the massive crowds…this is the place to go. You’re still going to see some people, but not nearly as many.

The day we went to Kolob Canyons it was super smoky as smoke from a controlled burn being held north of the park blew in. We wanted to make it back on a different day to see the canyon smoke free, but it just didn’t happen. Because of the smoke, we didn’t do much hiking. We did one small hike up to the Kolob Canyons Viewpoint. You can see from the pictures that it was really smoky so we didn’t dawdle too much here.

Kolob Terrace was the third section of the park we explored. We hit this section the same day we hit Kolob Canyon and you can see the smoke was still hanging around. This section of Zion is known mostly for the “Subway” hike. We didn’t do this hike…I’m not a fan of cold and the thought of traipsing through 32° water for hours on end…well…I’m going to pass on that every time.

You can also find the highest point in Zion in this section. Lava Point. You can see the view from there in the pic above. You can also see a huge lava flow from there (not pictured). We meandered our way around Kolob Terrace and then drove up to Kolob Reservoir to have lunch. It was nice and quiet with just a few other people milling around.

The last section of Zion National Park we explored was the Maine Canyon. This section of the park is the most visited section where you’ll find hikes like Angles Landing, The Narrows, and the Emerald Pools. Our first expedition into this section was to work on the Junior Ranger Book and to familiarize ourselves with the park and shuttle stops. We got there late in the afternoon and the park was starting to clear out for the day. The Junior Ranger book had us stopping at each of the shuttle stops looking for specific things.

Did you know that there’s an arch in Zion? Actually, there are several. Crawford Arch is the easiest to see even if it is barely visible, but you can see it if you know where to look on Bridge Mountain.

It took us a few minutes to spot it, but we eventually found it! For a long time, people thought it was a natural bridge…which is why the mountain is called Bridge Mountain.

When we first found out we would have to ride the shuttle anytime we wanted to explore the main canyon, we weren’t thrilled. Our first two experiences with mandatory shuttles weren’t the best. Tons of people…all of them pushing to get on and off the shuttles…most of them in a bad mood…we avoid those types of crowds as much as possible. In order to try and cut down on the crowds, we went in and out of the park during odd times. Very early or later in the after noon seemed to be the best times for avoiding the biggest crowds.

One of the hikes we did in Zion was the Riverside Walk Trail. This is the trail to get to The Narrows. It takes you along the Virgin River for a mile or so then the trail ends and The Narrows begins. This is a great hike for those of us who are curious about The Narrows, but don’t want to hike in freezing water. You can rent gear that’s supposed to help with the cold, but I talked to a few people as they were finishing this trail…and you still get wet…and it’s still cold. When we were there the water was right at freezing. We decided to save all of the water trails for when the water and the air (it was a balmy 40° while we were there) are both warmer.

The Riverside Walk was a great walk in the park. Really, that’s what it was. The trail is paved and takes you beside the river the whole way. One of the coolest things you’ll get to see on this trail is a weeping wall. Zion is all about the weeping walls. I don’t have a good picture of a weeping wall…it’s hard to capture the right angle/shot of it to really convey what and how big it is. I’m not an expert photographer…I just point and shoot with a semi-fancy camera. So, what the heck is a weeping wall? Well, a weeping wall is when the water that is seeping down from the top of a sandstone (or really any) rock can’t get through the stone going down anymore so it goes sideways…and forms a weeping wall…or sometimes it’ll form a spring. Usually on weeping walls you’ll find hanging gardens that are just…magical. Seriously…it’s amazing stuff.

One of the neater things you can do at Zion right now (or at least when we went) is see a juvenile California Condor. Chick #1000 and its parents were sticking around shuttle stop number eight. We stopped by a couple of times and were rewarded with a few views. The Ranger that was posted there told us that if one of the adult California Condors were to fly down and land next to us, they would stand at 4′ tall. Guys…I’m 5′. Those area some seriously big birds! In the right picture you can see one of the parents sitting near the top of the tree.

In the right picture you can see the adult condor a little better. I tried to take a picture through the scope the Ranger had set up. In the left picture, you can see the juvenile chick #1000 sunning it’s wings. It was fun to see these big birds. While we were there one day, one of the other visitors was telling us how he had been on the team who caught the original California Condor transplants. He got a little emotional talking to us about it all. It was a treat to see it all through his experiences with the birds.

For those of you who know me…you know that I’m not a morning person. Not even a little. And if you’re wondering…this (the picture above) is what the butt-crack-of-dawn looks like. We got up way too early on our last day in Zion to do the Angels Landing Trail. We wanted to be on the first shuttle out that day so we could beat some of the crowd.

We made the very first shuttle out that day. It wasn’t packed, but it was pretty full. Most of us were going to one of two hikes…Angles Landing or The Narrows. You could tell which hike a person was going on based on whether they were wearing water proof gear or not.

I’m a slow hiker. I’m slow going up due to lack of being able to breath (I’m out of shape…and love my foodies) and I’m slow going down (I have a thing about slipping on a trail). And…I’m always stopping to take pictures…of everything. So I knew it would take me longer to get up this trial. Some of these switchback are close to a 15% grade…which doesn’t sound like a lot, but when you’ve been walking at a constant up for close to two hours…15% feels more like 75%.

We got through one set of switchbacks and thought we were almost there when we found the second set of switchbacks. I think this second set is called Walter’s Wiggles. They were even steeper than the first set. Everyone on our shuttle had passed us by this point and the people on the next shuttle were starting catch up and pass us…but really, the trail was pretty empty. It was still super early. The lighting was starting to get to that amazing golden hour lighting that makes everything pretty.

So…I had mixed feelings about taking the boys on this hike. Angels Landing is a dangerous hike once you reach the chains section of the trail. Until then…it’s just switchbacks and anyone can do it. But the chains section…it’s serious. People fall of this section every single year. We had several talks with our boys about this section and we were confident that they wouldn’t mess around or get distracted. One mess up…one wrong step…it wouldn’t be good. I honestly think this hike should go to a permit based system that has an age requirement of 14. As Zion gets more and more popular the crowds on Angles Landing get worse and worse.

We decided that at any time one of us felt like we couldn’t go on with this hike that we would all stop and turn around. Zion has bolted chains into the rock pretty much the whole way up to the summit of Angles Landing, but when the trail is crowded and you have to go around other people on the trail…then there are times when you might have to let go of the chain. That’s another reason we started so early. I didn’t want to deal with crowds on the chain section. In fact, we wouldn’t have done the chains section if it’d been really crowded.

We only had a few people coming down as we were making our way up and each time it was at a place that was a little wider so hanging onto the chains wasn’t imperative. I didn’t take as many pictures or videos on this hike as I would have liked to…I took them when I felt like it was safe, but didn’t want to mess with my camera or my phone very much.

It’s only two and a half miles to the top of Angels Landing. There’s an elevation gain of close to 1500 feet. There were several places on the trail where I’d pause to try and breath and I’d look to the side and would have my breath taken away by the view. I can’t tell you how many times I said wow during this hike. The picture above is one of my favorite pictures I took during the Angels Landing hike. It was taken at one of the wider spots on the chain section and it was during one of those “wow” moments.

When we made it to the top we had some amazing views! And there were only about twelve other people up there so it wasn’t crowded at all. We took our time ogling the views and taking pictures then sat down and had a snack before heading back down the trail. There were these cute little squirrels running around the summit. They weren’t shy at all! They would run up onto people to see if they could get a bite of whatever the human was eating. We could have stayed up there for hours but we wanted to get back down the chain section before it got crowded.

Thankfully, we didn’t start seeing a lot of people on the trail until we were close to the end of the chain section. We saw more people as we were going down than we saw when we were going up…but it still wasn’t bad at all.

When we got to the area of the trail called Scotty’s Landing, the crowd was pretty bad. There were probably close to a hundred or so people milling about trying to catch their breath before heading up to the chain section. We passed tons of people going up as we made our way down the switchbacks and we all agreed we’d made the right choice when we woke up sooo early to do this hike before it got crowded.

Even though Angels Landing was only a five mile hike, it was one of the hardest hikes we’ve done. And not just because of the physical aspect of it…this hike takes a lot of mental fortitude during the chains section. You have to pay attention…and me being the mama bear that I am…I was constantly watching and worrying about my kiddos…and my partner-in-crime who has trouble with heights. I wouldn’t even consider taking my kids on this hike before the age of 14. They all did awesome. None of us wavered in our desire to make it to the summit. We’ve talked fondly of this hike quite often since the day we did it (as I’m writing this post, it’s been close to two weeks since we did the hike) so it shouldn’t be a surprise when I tell you that this hike is on our top five favorite hikes. It’s firmly in the number two slot, coming in right after…The Harding Ice Field Trail.

Here’s a fun little tidbit for you…The reason it’s called Angles Landing is because back in 1916 a group of people traveling through the area commented that it was so high only an angle could land on it. The trail to the summit of Angles Landing was made in 1926. It’s become so popular that during busy times at the park, you might have a three hour wait to get to the chain section of the trail.

That’s all I have for you on Zion National Park. We totally fell for this park… so much that we’re trying to decide if we’re going to change our plans for Spring of 2020 so we can spend a little more time there as we head north from Arizona.

That’s it Guys! That concludes the Utah section of our National Park Tour! We spent an amazing two months in Utah exploring and found some of our favorite parks/hikes. Utah…we will be back!

See y’all down the road!

#NationalParkTour

Dirt Roads and Hiking

Dirt Roads and Hiking

Hey Guys! This is the last of three posts about our two weeks in the Moab, UT area. We really did cram quite a lot into those two weeks!! I feel like we went non-stop and we still didn’t even scratch the surface of what’s in the Moab area. I think it’s safe to say that we will definitely be revisiting Moab in the future.

One of our favorite things about this Nomad life of ours is the people we get to meet. Our neighbors in Moab were super nice! They were in the middle of an epic road trip from Massachusetts all the way to Arizona and back. When they left, they gave us a few guide books for the Moab area and they left notes as to what they did! Like I said..super nice! We ended up doing the Gemini Bridges trail/hike because they’d recommended it and Guys, it was awesome! To get to the Gemini Bridges we drove up a dirt 4×4 road. Yup, we found another dirt road to drive on. The road up to the plateau that the bridges are found on was steep and narrow with a pretty big drop on one side, but once we got up onto the plateau, the road was better. There are a few places to park and a marked trail out to the bridges. Gemini Bridges are two natural bridges that lay side by side. There’s about a six foot gap between them and apparently some people try to jump the gap…and a few have missed. The sheer height of the cliffs near the bridges could set someone’s vertigo off. It was so steep! When we got there a group was leaving. We had the place to ourselves for about ten minutes.

When we left Gemini Bridges we went a different way and ended up on a paved highway just outside of Canyonlands National Park. On the way home we found a scenic pull off with a short hike. Not a bad view. We were amazed at how far we could see. The day we went was crazy windy! We were very careful not to get too close to any of the edges because we were concerned we’d get blown off by a gust of wind. It was that windy.

A couple of years ago, I found a picture of Fisher Towers somewhere on social media and I immediately wanted to go see them in person. I tagged them on my Google Map and waited patiently for the time we would be in the Moab area.

I loved this hike! It was just the right combination of effort and views to make it interesting and enjoyable. I can’t really imagine doing this hike in the summer though. There wasn’t much shade to be found on the trail and there was a fair amount of effort in going up and down to navigate this trail. The whole area is made of pinnacles, spires, and fins that you wind your way around.

After we finished playing over at the Fisher Towers, we headed down the road to Onion Creek for a dirt road adventure. Onion Creek got it’s name from the slightly stinky smell of the creek. You splash through this creek several times as you make your way through some really cool rock formations. We were surprised by all the different rock colors! The top right picture in the above gallery reminded us so much of Artist Pallet in Death Valley. We didn’t drive the entire road, but what we saw was really cool!

Corona Arch trail is one of our favorites in the Moab area! This trail is only three miles long , but it leads to one of the biggest arches in the Moab area. We went on a late afternoon, mid-week and we pretty much had the place to ourselves. We passed a few people on the trail and there was one other person at the arch with us, but there wasn’t a crowd of people like you’ll find over in Arches National Park.

The trail to Corona Arch has you climbing up a ladder and using some steps that have been cut into the side of the rock (called Moki steps) along with some cables. It wasn’t too technical, but just hard enough to be fun. It’s a great hike for someone who’s trying to get outside of their comfort zone just a little and get off the flat path.

Your effort is rewarded with not one but two arches. Bowtie Arch is…I think…a pothole arch and it’s smaller, but still very cool. The star of the hike is Corona Arch. We actually all voted Corona Arch our favorite arch in the area. And yes, that’s including all of the arches we saw at Arches National Park! Corona Arch has an opening of 140 feet across by 105 feet tall and is made of Navajo sandstone like most of the arches in the area. Rumor has it…that airplanes used to fly through the opening of Corona Arch. Since it’s not in a National Park…it’s not quite as protected. I think it’s now a BLM NP Unite and protected land though so hopefully, it’ll receive some more protection.

That’s it, Guys! That is pretty much everything we did in the Moab area. We checked off everything we had on our list, but ended up adding several new things to see next time!

See y’all down the road!

#NationalParkTour

Arches and Canyons

Arches and Canyons

Hey Guys!! We made it to Utah!! We loved Colorado quite a bit and we’re totally going to miss it, but we were ready to adventure into a different state…at least for a little while.

Y’all know we’re on a National Park Tour so it shouldn’t be a surprise that our first stop in Moab was Arches National Park. We stayed pretty close to Arches, so we were in and out of the park on a fairly consistent basis during our two weeks in the area. We would head there in the late afternoons to get some hiking in and it worked out pretty well because most other explorers were headed out about that same time which meant…fewer people in the park.

Arches National Park is home to over two thousand natural arches made out of sandstone. There are several arches you can see right from the paved road that winds its way through the park. But, if you want to really experience an arch…you’ll need to get out of your car and get some sand under your feet. To photograph an arch, you’ll want a little distance so you can get the whole arch in the shot, but to get a good feel for how big some of these arches are, you’ll need to get up close to one. This can be easier said than done on most days in the park. Arches NP is super crowded with tons of other people trying to get “the view” of that same arch you’re trying so hard to get “that shot” of. It can be frustrating. We try to avoid going into a busy NP during the weekend or over a holiday. We had better luck with crowds by going during odd times…usually later in the afternoon/evening throughout the week when most people were leaving.

Arches are the main attraction at this National Park, but they aren’t the only attraction. There are also towering sandstone spires, pinnacles, fins, and balanced rocks. Some formations look like elephants! To get to Sandstone Arch, you have to hike between two sandstone fins! It was a really short and neat hike.

It takes a lot to make an arch. You have to have the right kind of rock and it has to be exposed to just the right combination of environmental factors…and time…lots and lots of time. In order to be considered an “official arch”… there has to be at least three feet of space within the opening of the arch. Becoming an arch is no easy task.

If you’ve ever seen a postcard or a sticker or sign for Arches National Park, chances are…you’ve seen Delicate Arch. Delicate Arch is the poster arch for all arches at Arches National Park. It’s the arch that all of the other arches want to be. It’s a stand-alone, complete arch with an awesome view. There are two ways to see Delicate Arch. You can go to one of two viewpoints or you can go to the trail-head and hike the mile and half up, up and up to get to the actual arch. We did both. We stopped by the viewpoints first, but when we saw how far away we still were…we went back on a different day to hike up to Delicate Arch. I’m so glad we hiked it…the view from the top is spectacular and while there was quite a lot of up to this hike, it wasn’t too horrible.

Our favorite hikes at Arches National Park was the Devils Garden. There are several different trails and arches you can get to within the Devils Garden. We did the four mile Double O Arch Trail and it was awesome! When you first start this trail the crowd can be a bit thick, but once you get to the good stuff…the part where you climb up the back of one of the fins…the crowd starts to thin. And then when you walk across the back of a different fin…Guys…the views. I caught the boys with their mouths hanging open and their cameras out trying to capture the amazingness of this hike. I know, I know, some of you don’t think amazingness is a real word…and if it’s not…well, it should be. It. Should. Be.

We timed our Double O Arch hike just right. We got there ogled all of the views, shimmied down the back of the fin and made it to the trail-head right as the light show started during that evening’s sunset. We stopped the car several times so we could all sit and watch the sunset. Mother Nature was not playing around that night…no…she was showing us some of her best stuff. She always wins. Always.

We only spent a day at Canyonlands National Park. We were a little farther away from it and there was so much to see and do in the area that we didn’t want to take the time to drive all the way back. We only had time to visit one of the three sections of Canyonlands NP. We spent time in the Island in the Sky section. We’ve already discussed the need to go back and see more of this park. It is, after all, the biggest national park in Utah and that is saying something.

We did the scenic drive, stopped at all the stops, and got in a couple of short hikes, but we were really wanting to drive down into the canyon and then find our way over to Potash road where we could drive back to Moab…on a dirt road…following the Colorado River for most of it. Y’all know how we are about dirt roads. Ha! Canyonlands National Park has a canyon within a canyon within a canyon. I’m not even joking. There are three layers of canyons at work in the picture above!

We seem to always find ourselves on a dirt road. What is it about dirt roads that we love so much? Well, they usually take us to some pretty dang awesome places and…not many people are equipped to drive them so the crowds tend to thin out a bit. We drove down out of Canyonlands on Shafer Trail then made our way over to Potash Road and back to Moab. Potash Road is one of our absolute favorite dirt roads in the Moab area. The views along this drive are breathtaking as it follows the Colorado River for several miles.

Well, Guys…I think I’m going to pause here for now and pick up with some more of our Moab adventures next time!! We crammed so much into these two weeks…So, stay tuned!!

See y’all down the road!

#NationalParkTour